
Love the long-lasting shine of gel polish but not sure how to remove it safely at home?
Whether you're in between salon appointments or just prefer a DIY approach, learning how to remove gel nails at home without causing damage is key to keeping your nails healthy and strong.
In this guide, we’ll walk you through a simple, step-by-step gel nail removal routine using manicure tools you likely already have + expert tips and product recommendations to make the process safe, easy, and effective.
Why Proper Gel Nail Removal Matters
Peeling or picking off gel polish might seem tempting, but it can seriously damage the natural nail underneath — causing peeling, thinning, and long-term breakage.
Using the right tools for effective gel removal and aftercare is essential for maintaining nail health, especially if you regularly wear gel polish.
By following the correct technique and using high-quality nail tools, you can remove gel nails safely at home without weakening your nail beds or causing irritation to the surrounding skin.
How to Remove Gel Polish at Home in 5 Easy Steps
- Step 1: Clipping the gel polish
Trim down each nail as much as possible without cutting into your natural nail. The shorter the nail, the easier it is for the gel to soak off and the quicker the removal process.
Gel can be tough to cut through, so using a strong, precise tool like our Combo Clipper Set or Stainless Steel Nail Scissors. will make this step easy and more efficient.

- Step 2: Buff the surface
Use a medium-grit nail file (we recommend 100/180 grit) to gently buff away only the top coat of the gel polish. This helps break the seal and allows acetone to penetrate more effectively during the soak.
Be careful not to file all the way down to your natural nail — you should aim to remove just the shiny surface layer, around 30% of the polish thickness.
Filing should always be done with even pressure and a “less is more” approach. A dual-sided, 100/180 grit file, like our Neon Hot Filematess, is ideal for working through gel polish layers safely.

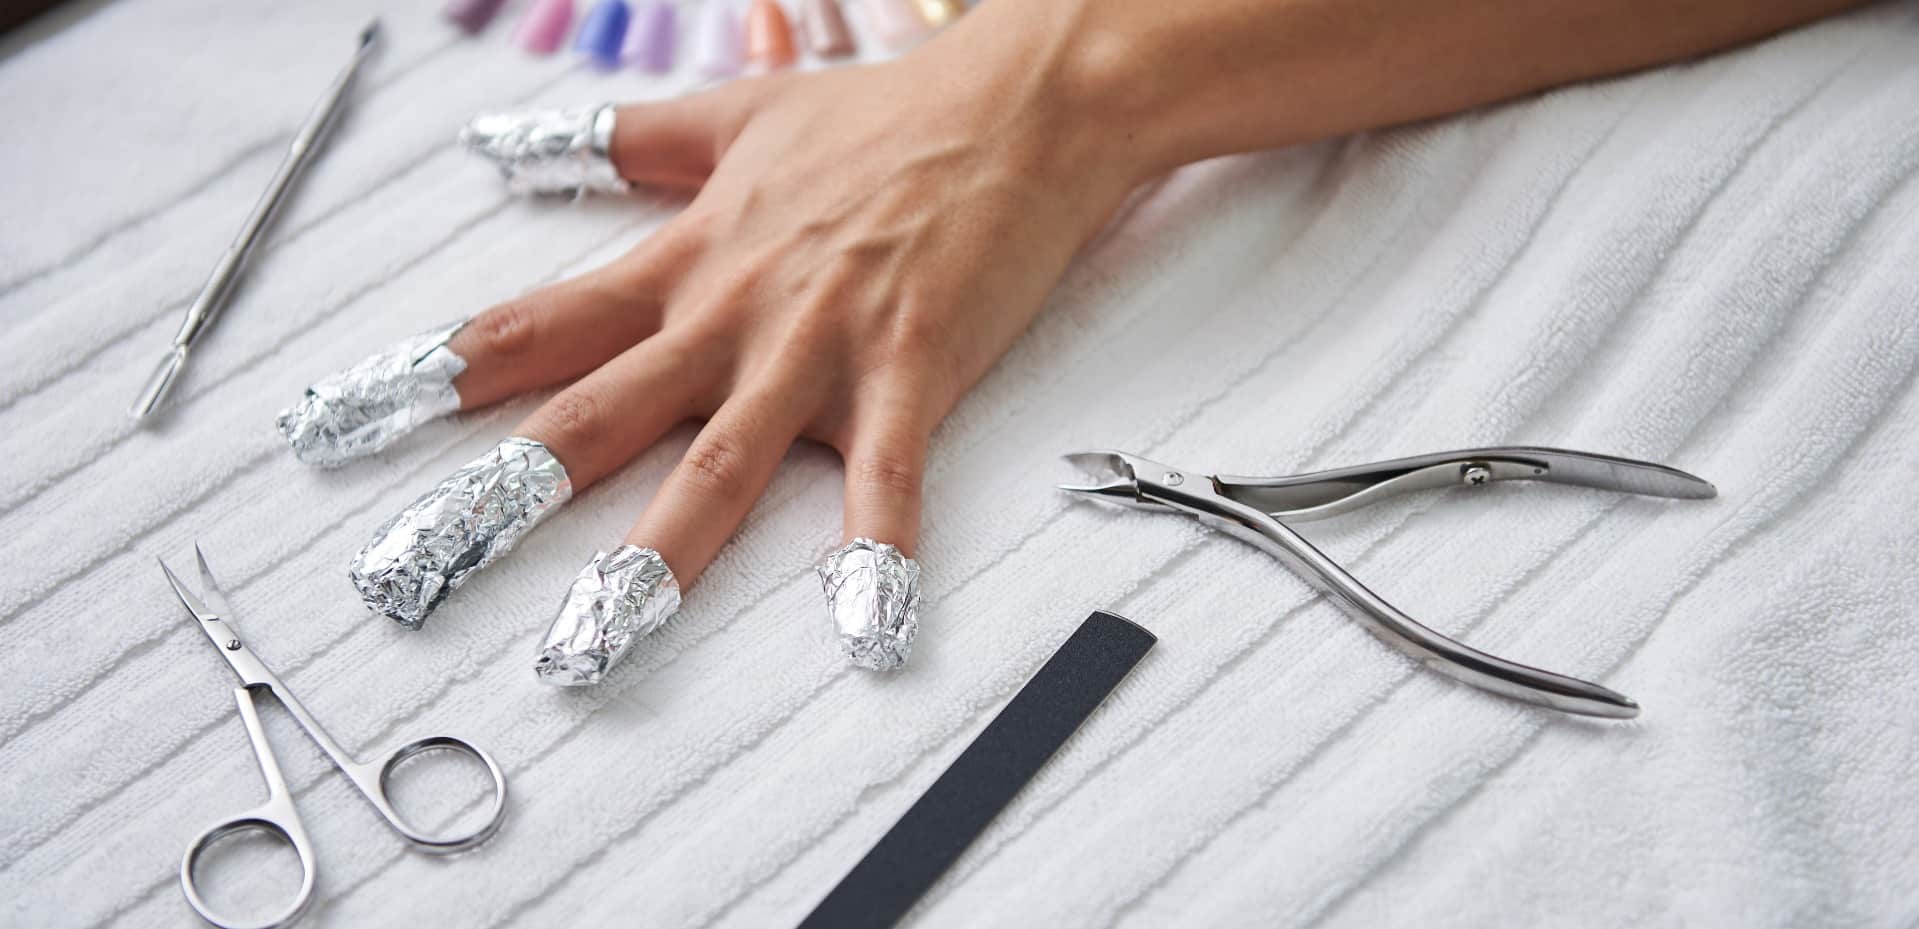
- Step 3: Soak your nails
To break down gel polish, you need 100% pure acetone (regular polish remover won’t work). Before soaking, apply cuticle oil or petroleum jelly to your cuticles to prevent dryness.
Soak cotton pads in acetone and place one on each nail, wrapping with foil to secure. Leave on for 10–15 minutes to soften the gel. Avoid rushing this step because removing the gel too soon can damage your natural nails.
- Step 4: Remove the gel polish
After soaking, use a cuticle pusher like our dual-sided Pushy and Nail Cleaner to gently ease the gel off the nail. Apply light pressure to avoid damaging your natural nails.
For stubborn spots, gently file the area (without going too deep) and resoak for another 5 minutes.

- Step 5: Smooth and finish
If there are any small patches of gel or dry skin, use cuticle nippers to carefully trim them away. This step helps clean up the nail edges without pulling or tearing.
Use a nail buffer to smooth out any uneven areas and restore a natural shine to your nails. Buffing also helps remove any final traces of product.
Finish by applying a nourishing hand cream or cuticle oil to rehydrate the skin and nails after using acetone.

Explore our full range of manicure tools and sets for effortless, at-home nailcare.


